Explanation
I created PhotoChamp with the knowledge that I had gained using the Rails framework from building my previous projects along with the help from my mentor at Bloc.
Problem
I wasn’t tied to following a guide when developing PhotoChamp so I wanted to build something fun and interactive. I wanted to showcase a lot of what I learned from building many of the Bloc projects so I added elements from each, while still maintaining a functional and coherent web app.
Here’s a list of some of the milestones for PhotoChamp:
- Users
- Photos
- Categories
- Challenges
- Photo Record
- Favorites and Comments
- Admin
Solution
Many of the solutions for each problem piggy-backed those of the Bloc projects. Although I used what I learned from those projects in PhotoChamp, I kept it unique and native to how I had envisioned PhotoChamp.
- Users
I relied on the Devise gem to manage users signing up and logging in. There were to be three different user types: ‘free/standard’, ‘premium’ and ‘admin’.
- Free users are only allowed basic priveleges such as, uploading up to 5 photos to any existing category, challenging any photo in the same category, commenting on any photo.
- Free users are encouraged to upgrade to a premium account at $10/yr. This entitles them to up to 20 photo uploads and the creation of new categories. More priveleges and functionality can be added to make subscribing to a premium account more desirable.
- Administrators have the power to remove categories and other user’s photos deemed as inappropriate. They can also view photos that are reported as inappropriate from users as well as ban/unban those users.
- Photos
There are three resources that are involved here.
- Amazon Web Services is being used to store user photos.
- CarrierWave does the uploading.
- MiniMagick works alongside CarrierWave to resize the photos to their necessary sizes.
-
Categories Organization of the photos is important. If the user experience is sloppy, it would detract from their care for the app. Categories were made to group photos together and keep challenges fair by only allowing photos of the same category to compete. Free users can upload their photo only to existing categories. Only premium users and administrators can create new categories.
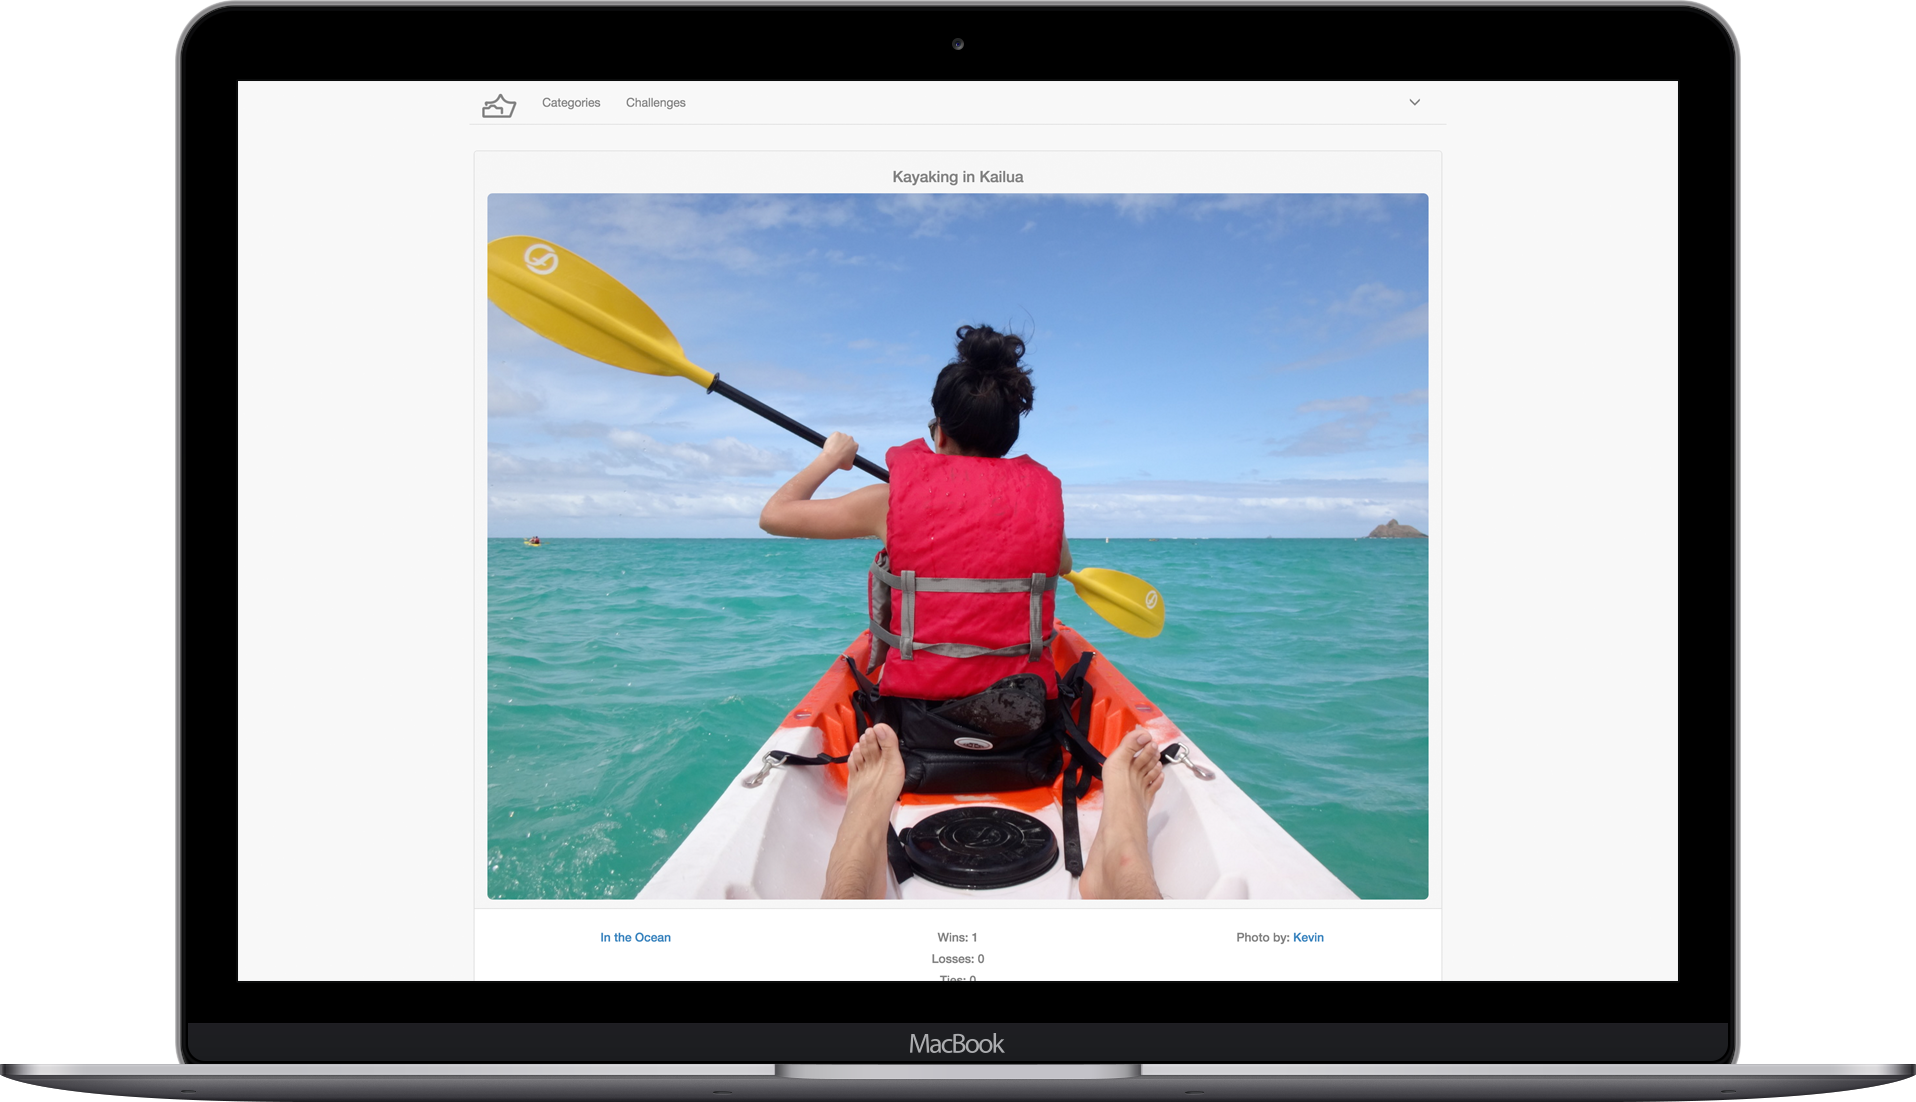
- Challenges
PhotoChamp is built around the challenge. This was the most difficult part of the application to get right. Users can choose one of their photos to compete with another’s within the same category and share the challenge to see who’s is more liked. Each photo displays its win-loss-tie record.
- Pundit is used to restrict which photos can compete against each other. Photos that are already being challenged cannot enter another challenge (with the same two photos) until that challenge has ended. However, photos that are in a challenge can start a new challenge with any other photos.
- SendGrid does the emailing.
- When a challenge is created, an invitation email gets sent to the user being challenged. That user must accept the challenge by clicking a link in the email and signing into their account. Another email notifies the original challenger that the challenge has begun.
- When a challenge completes, the votes determine a win, loss or tie and sends an email to each user notifying them of the outcome. This is where photo records get updated.
- Facebook and Twitter buttons are used to share the challenge. This allows the challengers to get more votes, as well as expose PhotoChamp to more potential users.
-
Photo Record Records of a photo’s wins, losses and ties are displayed when a photo is viewed. Better records increase their overall rank in the application and the highest ranked photos are displayed as the Top Competitors.
-
Favorites and Comments As a user browses through all of the photos, they can mark any of them with a star and have them appear on their page. Users can also leave comments on any photo.
- Admin Lastly, some administrative power had to be added to maintain an appropriate environment. Administrators can delete any photo and any category. They also have access to an admin page which displays photos that have been reported and banned users with the power to unban.
Results
Much of the functionality testing was done as I wrote it. To start, I had to envision the purpose of each element and create wireframes for each necessary view. Running a local server allowed me to compare the view with my wireframes. After writing a controller action or model function, I tested it on the local server and console, trying to eliminate any errors. After passing each function test, I would then move on to the next until I complete a milestone, where I could test the application as a whole. This is where bugs from interacting with each element would be squashed.
When the application got to a point where all of my tests passed, I deployed it and shared it with friends to try out. I created a simple Google Form to collect feedback from their experience. After the first two test users ran through PhotoChamp, I was able to make improvements from their responses.
Conclusion
Almost everything that I planned out from the beginning stages of PhotoChamp went into the current version. The basis of many of the components came from the Bloc projects. Tying them all together and making the views look nice was the hardest part of the whole process. In the end, I was surprised that I created a functioning product that resulted in something just as described during the user story write-ups. One of the biggest gain from creating this application is knowing that there is virtually a limitless amount of resources to help you do what you want. When posed with an issue, chances are someone ran into the same thing and searching through Stack Overflow, displays how their issue was answered. Using third-party libraries or gems was a time-saver by not having to rewrite code and allowing me to focus on PhotoChamp’s business logic.
Because PhotoChamp was developed out of my own creativity and desire, I had a certain attachment to the project. By making a rock solid application, I was able to learn a lot of best-practices that I’ll use in future projects.